Saturday, November 19, 2005
It was 36 years ago today, that the Apollo 12's crew, composed of Pete Conrad (CDR) and Alan Bean (LMP), was landing their Lunar Module in the Ocean of Storms. The crew on this mission was kind of an oddball in comparison of the other crews, simply because the 3 of them (let's not forget the CMP, Richard Gordon) were best buddies, when most of the other crews had mixed level of friendship ... Even some tension at time like in the case of Apollo 11 crew. If you have some free time (lots of it) on your hand, I will suggest reading the Flight Journal and the Lunar Surface Journal for this particular mission. There is a wealth of information on both web sites, You won't regret the time spend on them :-) And you'll be able to see the various laughts and jokes exchanged by the crew and the Capcoms. A very pleasant read for sure. Also, don't miss the video of the landing (10mb), and its accompagning orientation document (terrific work by Gary Neff). Speaking of pleasant things, I'll be away from this blog for the next two weeks for some (well deserved) vacations! Whoopie! :)
Friday, November 18, 2005
Flying the LM ...
Oh no, not me ... I haven't gone that far in my Orbiter training, don't worry! I'm still in LEO for a very long long .. loooooog time :) Beside the LM is currently not flyable in the beta version of NASSP. Anyway ... So yeah I thought I will share with you a rather neat article (from 2004) I found on the web: "To the Moon and Back: Flying the Lunar Module" by Jim Oberg. A must read for any Apollo nuts who's wondering how it must have been to fly that weird looking contraption from orbit to the Moon surface and then back to orbit.
Wednesday, November 16, 2005
The way of the hacker ...
I recently joined the NASSP team as an hacker rather than a developer. There is, in my mind, a rather large difference between the two labels. As my goal is to try to tackle a few things that may be considered as (minor) details by the main members of the team, I feel like I'm more into hacking around than actually developing parts of the project. Of course, this choice is due to the fact that I don't have the time to be more involved in that project. I must not forget that my main interest is spaceflight and Apollo stuff. Beside, I'm already writing software all day for living .. do I really want to write some more on my spare time? (been there, done that)
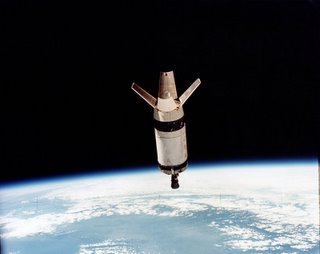
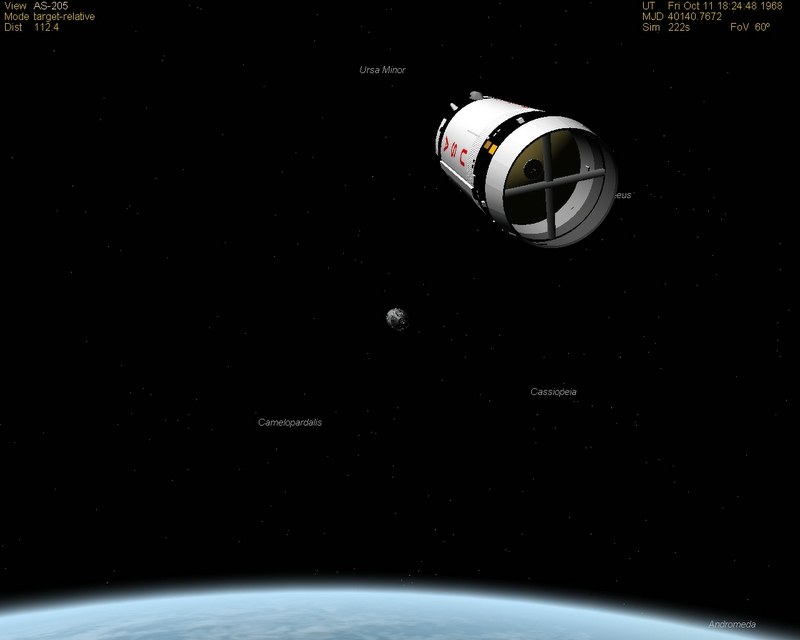
As one of my first hack, I have been looking at making the S-IVB stage used on the Saturn IB rocket to have it's Spacecraft-LM Adapter (SLA) panels open like they did on the real missions, instead of been jettisionned like it was done for the mission carrying a Lunar Module or the docking module for the ASTP mission:
Monday, November 14, 2005
Walking on the Moon ... 3D!
Yep ... I finaly went to see Walking on the Moon 3D, an IMAX movie as you probably know by now, yesterday in a theatre in Langley BC. Now, that location doesn't offer the real IMAX Experience, but it's in 3D nevertheless, and ... oh my ... it's pretty good. I mean .. WOW! ... all the scene on the Moon are amazingly done ... My favorite was, of course, the Apollo 15 LM landing sequence ... it's really something. Anyway, so yeah .. overall it was a 40mn show well worth the $11 (CAN) or so I spent. My only grip is that I wished they had put more of the recreated Moon scenes and less of the original footages ... oh well.
Saturday, November 12, 2005
[104] Parameters - Field of View #4
In the conclusion of my previous post of the same serie, I was saying that having a different FOV for each different viewpoints in the 2D cockpit, was kind of a pain. During docking with the LM for example, we may have to switch back and forth between the left rendez-vous window (FOV = 24°) and the main control panel (FOV = 59.09°). Altought the FOV value can be changed using a keyboard shortcut (+/- 10°), this neither fast or practical enough to be a valid solution.
The best way of inforcing a given FOV depending on the panel you are looking at, is to actualy hack the source code of NASSP to perform an automatic change when you switch between the various panels of the CM cockpit. This is done by modifing the method
Saturn::SetView()
in the file saturnvc.cpp
, to insert the following code at the bottom of the method, right above the call to SetCameraOffset()
:// DarthVader's hack
if(InPanel &&; oapiCameraInternal())
{
double FOV = 27.58;
switch(PanelId)
{
case SATPANEL_MAIN:
case SATPANEL_LOWER:
{
FOV = 59.05;
break;
}
case SATPANEL_LEFT:
case SATPANEL_RIGHT:
{
FOV = 63.85;
break;
}
case SATPANEL_LEFT_RNDZ_WINDOW:
case SATPANEL_RIGHT_RNDZ_WINDOW:
{
FOV = 24;
break;
}
case SATPANEL_HATCH_WINDOW:
{
FOV = 25.34;
break;
}
default:
break;
}
oapiCameraSetAperture(RAD * FOV / 2.0);
}
// DarthVader's hack
Et voila! Because we're checking that the user is really in the inside cockpit view, we avoid the FOV to be automatically switched back when using the outside view. The big issue with that solution is that in order to hack as I did, you not only need to have the whole source code of the project (accessible with CVS on sourceforge.net), but also Microsoft Visual C++ 6.0. Unless you are a developer you may have to try the free version and I dunno how good/easy it is. Oh yeah ... and you also need to install Orbiter's SDK in your Orbiter directory. So, as we can see, even if it's a solution, it's definitly not the way to go for most Orbinauts ...
We may want to wonder if having a precise FOV setting is really worth the trouble. It is clear that using a value calculated from our settings (screen height and distance from screen) is definitly something that must be done. Now, adjusting the FOV according to the 2D panels like I did may not be required. A possible compromise could be to adjust it for the panels that is the most useful. In the case of the CSM, it will most probably be the rendez-vous windows. Afterall, the other panels don't account for much in term of visibility. In the end, it's up to you to decide what fit you best :-)
To conclude this series on the FOV, let's have a quick look at the Lunar Module and see what FOV we should be using. In the same way we did with the Command Module, lets look at the position of the astronauts in the LM on the two following pictures:
We can estimate that they were standing further away from the front window of the LM, than the arm reach length we estimated in the CM's case. I haven't found any document that precisely states the position of the crew when at the flight station, but for the sake of simplifying thing we will assume a distance equal to the distance from your eyes to your screen, 55cm in my case.
Another piece of information hard to find is the exact dimension of the LM windows. After browsing trought various PDFs documents and looking at some schematics to scale, I came up with the following figures: forward window 63.5x71.12x60.96 (cm) and 12.7x33.02 (cm) of viewing area for the docking window. For the forward windows, I couldn't find if it was the viewing area or the whole window dimensions. So instead of using this I decided to try mesuring the on-screen distance between the middle of the left and right windows (which span on 3 panels in the 2D cockpit). On the LM schematics it looked like it was about 115.2cm and I got 73.5cm on the screen. Using the now familiar formula, we can calculate the proper FOV for the two forward facing windows:
Now, let's do the same for the rendez-vous window, which in Orbiter is 9x21.5 (cm):
These two values are so close that it is probably easier to use 42° in both. Here's two screenshots taken from inside the LM:
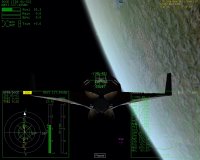
View of the CSM docked to the LM
Don't hesitate to comment on this post if you have any question, objection or comment related to its quality or content. Thanks.
Thursday, November 10, 2005
First Man
As I don't have a TV at home (and that I don't live in the US), I haven't seen last night 60 Minutes interview of Neil Armstrong. From the comments I have seen on Orbiter's forums, it looks like it was a good one. So ... there isn't just commercials and trash shows on the TV, afterall. What a surprise! ;-) The whole show is not available online, sadly, but there is a few snippets available, for us geeks.
In case you missed it, there is an authorized biography titled "First Man" which was recently released (10/05). Haven't got my hand on it yet, but it's on my Amazon's wishs list ... now if my wife could only read this blog, I'll get a nice X-mas loot ;-)
Tuesday, November 08, 2005
[104] Parameters - Field of View #3
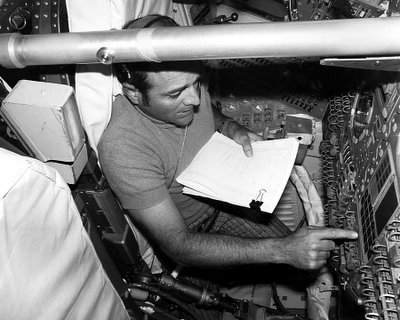
If we look at some of the pictures taken inside the Apollo's CM, we can see that the astronauts were standing pretty close the the main control panel:
Browsing trought the hundreds of Apollo documents available on the web, I couldn't find any precise figures on how far the astronauts were standing, but just from observation we can estimate it to be less than arms reach:
So to simplify a bit this experiment, we'll assume that the main panel is at the same distance from the astronaut eyes as our screen is from ours. In my case, this put the panel at 55cm away. As when we use a correct FOV value, everything rendered on screen by Orbiter is at the proper scale, the 2D panel we are looking at when flying Apollo should be rendered in real life size.
A quick comparaison of the on-screen size of the panel (95x39 cm on my screen) shows us that the main panel in NASSP is a scaled down version of the original (210x90 cm). We can then conclude that in order to have a realistic view from the main cockpit view, we should modify our FOV setting, bringing the 3D view in scale with the 2D panel. This will also apply to the other part of the 2D cockpit as well, altought the ratios will be differents, as we'll see a bit later.
The comparaison of the vertical size of the panel give us a value of about 0.4334. This mean that the on-screen panel is 0.4334 times the size of the original. Thus, what we see in the rendez-vous windows should look 0.4334 times smaller than it currently does. As we know, increasing the FOV value have the effect of zooming out, so we need to increase our FOV.
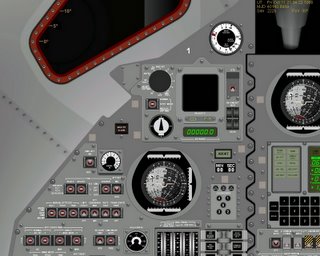
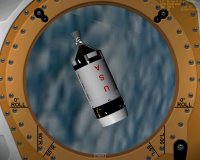
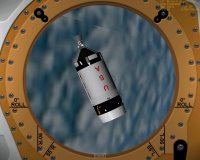
Here's a view from inside the CM using a correct FOV (sitting at 55cm of the screen) and the generic cockpit mode (which have the exact same view point as the 2D cockpit):
As we know from the first post of this serie, the FOV is calculated from the height of the screen and the distance at which we stand from it. The further away from the screen we are, the bigger the FOV and so the bigger the scale of what Orbiter renders. To obtain a scaling that match the main panel, we need to stand closer to the screen so that the scaling of the 2D panel become the scaling of the 3D graphics. We can do that by multiplying 55 cm by the ratio we got. Thus the distance at which I should be is about 23.83334cm. We can then use this value to calculate a new FOV:
If we now set this FOV we will get the following view:We could then verify that the view is 39/90 times smaller than the previous one by mesuring the width (or height) of the square defined by the intersection of the 2 beams in the center of the S-IVB.
The same logic can be applied to the other views that compose the CM's 2D cockpit. Such as the two side windows which real size were 33x33 cm and are scaled to 13.9x13 and thus should be used with a FOV of 63.85°. The following two screenshots shows the S-IVB viewed from the left side window with the adjusted FOV and with the standard one:
Both the hatch window and the two rendez-vous windows are interesting as they are actually slighly bigger than their real life counterparts. The circular hatch window have a diameter of 22.9cm on the real ship, and 25cm in Orbiter. The formula that we have been using so far is still valid, but instead of making things look smaller, we will zoom in a bit. With a ratio of about 1.0917, we can calculate the FOV for the hatch window as 25.34°. As we can see in the two following screenshots the FOV difference doesn't account for much change:
Last but not least, let's look at the handy rendez-vous windows, the only forward facing view on the CM (unless you use the generic cockpit mode). As this window have so many sides (5) I decided to compare the long bottom side between the real window and the one in Orbiter. With a size of 25.9 against 29.9cm, the real one is just like the hatch window, smaller than what we see in the simulator. By applying the exact same formula as before, we obtain a FOV of 24°:
To sum up, here's the list of the corrected FOV to use with the Command Module's 2D cockpit for my Orbiter setup (full screen, 55cm away from the screen and a standard FOV of 27.58°):
- main control panel : 59.05°
- side windows : 63.85°
- rendez-vous windows : 24°
- hatch window: 25.34°
In the next (and final let's hope) post on this Field of View serie, we will first look at the Lunar Module and then, as changing the FOV setting everytimes we switch from the various panels of the CM cockpit is kind of a pain, we will try to see if there is any way of making our life easier.
Moonstruck
On my way home last evening, as the Moon was visible, I ran a little experiment to measure the linear diameter of the Moon and see if the illusion I have been talking in a previous post was real. Putting my hand around the moon at arms reach (probably less than 55cm aways from my eyes) I then enclosed the moon between my thumb and index Finger. You'll be not surprised that the distance between my two fingers was indeed around 0.5cm! Amazing eh? No? Well, yeah ... okay.
Monday, November 07, 2005
Scrub!
Due to some ... hmmm ... bad weather over here, I had to scrub walking on the Moon 3D this week-end. Next week-end have been set as the new launch window. Sorry about that :-|
Once again, there is some interesting articles over at the Space Review, that you may want to check out, especially the one article on the myth and reality of the Chinese space program. I guess we, the space enthusiasts, should stop reading the chinese tabloid and get our facts straight, eh?
Apparently, there is some good stuff coming up for the next Orbiter release, as we can see on the latest teaser screenshot posted by the author:
Very nice. Can't wait to fly above it :-)
Sunday, November 06, 2005
[104] Parameters - Field of View #2
Using a tape measure, I came up with a better estimation of the distance from my screen to my eyes ... The difference isn't that big actually, only 2cm. But it translate into a change of the FOV value I have to use with Orbiter, from 28.6 to 27.58 degree, so around 1 degree. Armed with this more precise FOV, I thought that it will be interesting to check if I could somehow verify that what we see on our screen is properly scaled. This can be easily done by calculating the projected size of a distant object on my screen, knowing the simulated distance between my eyes and the object.
As I'm still orbiting in my trusty Apollo 7, I could use the S-IVB stage as the distant object and estimate the distance between it and my eyes using the docking MFD:
Or I could use the Moon and its known angular diameter in earth vicinity to calculate its size on the screen:
Using the Moon is actually a more interesting experiment which have already been partially answered by the good Doctor Schweiger in the Orbiter's FAQ. Let's see how we can calculate the expected diameter of the Moon in Orbiter.
The very handy small-angle formula tell us that the angular diameter of an object is related to its linear diameter and its distance:
The formula is the following:
Where the angular diameter is expressed in second of arc, the linear diameter and the distance in the same unit. The angular diameter of the Moon from the vicinity of earth being about 1800 arc seconds (0.5 degree), we can easily calculate the diameter of the Moon on a spacecraft window trought which we are looking, with the help of the small-angle formula:
Using 55cm as the distance, and 1800 for the angular diameter, we find that the linear diameter of the Moon is around 0.48cm. As I'm using a FOV (27.58) that is calculated for a distance of 55cm (from the screen to my eyes), I can measure, using a simple ruler, the on-screen diameter of the Moon ... and oh surprise, it's about 0.48cm! Thus Orbiter does render the Moon at a proper scale.
It's a bit hard to believe that Orbiter renders the Moon properly as if I step outside when the Moon is visible, it sure look way bigger than 0.48cm ... But in fact, Orbiter is right. The way the Moon appears to us is either an optical or a cognitive illusion ... There is still a fair amount of discussion on this problem that is not limited just to the Moon, but also to the Sun and constellations.
The small-angle formula is a pretty handy formula to know. There is a couple of web sites that provide online calculators for it, such as 1728.com.
Don't hesitate to comment on this post if you have any question, objection or comment related to its quality or content. Thanks.
Friday, November 04, 2005
Slowpoking in LEO
Ahhh .... Low Earth Orbit (LEO) ! Isn't it that cool? Orbiting around with the S-IVB for companion! Sure, landing on the moon will be pretty cool ... I suppose ... but for now, as I'm diving deeper and deeper in the details (maybe too much?) of this simulator while learning more about astronomy and the Apollo's hardware, I'm kinda stuck in LEO ... but only within Orbiter, 'cause thanks to Tom Hanks, I will be walking on the Moon 3D this very week-end ... at my local IMAX theatre :-) Stay tuned for some feedback on that show ... I just hope I won't experience motion sickness ... I'm usually pretty sensitive to that .. :(
Wednesday, November 02, 2005
[104] Parameters - Field of View #1
If you are, just like me, fairly new to Orbiter you probably are a bit confused about the whole Field of View (FOV) thing, and the user manual just doesn't really help explain what exactly is the FOV and what value you should be using:
The camera aperture can be adjusted under the FOV tab in the Camera dialog. The supported range is between 10 and 90 degrees (Orbiter definies the field of view as the vertical aperture, between the top and bottom edge of the simulation window). The most natural aperture depends on the size of the simulation window on your screen and the distance between your eyes and the screen. Typical values are between 40 and 60.
The trick to understand the FOV, is to realize that your screen (or the window if you are not running in full screen) is seen by Orbiter as a window on whichever spacecraft you happend to be flying. So what you are seeing on your screen, is pretty much what you will see in reality if you were looking from a given position inside your spacecraft (the viewpoints are sets by the spacecraft's developers as the position of your eyeballs inside the spacecraft).
In order to render on your screen a realistic view, Orbiter need to know how far away from your screen you are, so that it can adapt the rendering. Considere this: If you are looking outside from your house, at a car parked on the street and that you step away from the window to about twice the distance you were at before, the car will not look twice smaller than before ... However, if you do the same whiles looking on your screen, that spacecraft you were going to dock with will look twice smaller ... not very realistic, right?. To help avoiding this kind of effect, you need to adjust the FOV value according to the distance from the screen to your eyes.
Calculating the FOV is actually not very complicated as it is simply one of the angles from the triangle formed by your eyes and the vertical edges of the screen:
With a bit of basic trigonometry, we can write the following formula:
(screen_height / 2) / distance = tan (FOV / 2)
and calculate the FOV as
FOV = 2 * tan-1((screen_height / 2) / distance)
In my case, the distance from my eyes to my screen is around 53cm and the height of the viewable part of my screen is 27cm (I use Orbiter in full screen). If I apply the formula above, I then obtain a FOV value of about 0.499 ... huho ... oh wait it's in radian! A quick conversion to degree (value * 180 / Pi) and I have a value of 28.6 that I can directly enter in Orbiter as my FOV :)
If you are still a bit confused, considere that Orbiter is interested in knowing how much of your vertical field of view is occupied by your screen, so that it can render what you will be seeing if your were in a spacecraft, looking trought a window of the size of your screen. Of course, because our screen sizes are limited, we only see a small portion of what you will see in reality (human vertical field of view is around 180 degree), but thanks to a proper FOV value what you see is realisticaly scaled and located.
Let's look at what I see on my screen when using the virtual cockpit (VC) of the Delta-Glider (DG) with the FOV value we just calculated:
Pretty up-close eh? Did I made a mistake? Let's have a look at the spacecraft in outside view:
Hmmm ... it looks like what Orbiter is showing us in the cockpit view is about right ...
The Head-up display (HUD) is really right in front of the pilot eyes, so the FOV we calculated is (about) correct. Now, if you want to see some of the instruments, you need to move your virtual head around quiet a lot ... and that can be a bit inconvenient. Depending on your preferences you may want to adjust the FOV to allow you to see more of the cockpit. It will be less realistic looking (specially with a very high FOV), but more practical. The following screenshot show the VC with a FOV of 90 (note the distortion on the edges of the image):
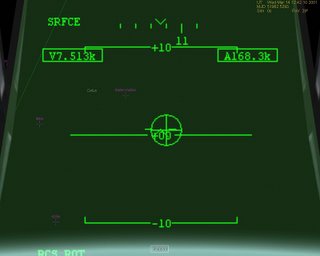
It is interesting (but somewhat not surprising) to know that whatever cockpit mode you are using (VC, 2D or generic), the view that Orbiter renders will alway be the same:
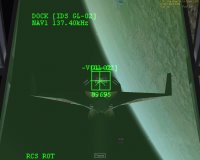
I don't know about you, but something on the second images above doesn't feel right to me ... In Orbiter, the 2D cockpits are simply rendered on top of the 3D view without any scaling to adapt the size of panels to whatever FOV you are using, leaving on the same screen two displays that are not at the same scale, thus somewhat throwing your brain off-balance when trying to to estimate distance and size. There is nothing wrong with the way Orbiter do it, but I beleive that adapting the FOV when using a 2D cockpit may be required when you want to look at something that look somewhat realistic. In the example above the 2D cockpit as a screen width around the same than the HUD in regard to the scene, altought it will be many times bigger in reality. Your brain may realize that the panels are a scaled down version of the reality so the scene shown must also be scaled ... From there, it's all about perception and how close to the real thing you want to stay.
In the next post, I will try to explore this question with the georgous CSM and LM 2D cockpits made by the NASSP team: